How To Install Apache 2 On Windows
It provides all the steps required to install Apache HTTP Server i.e. Apache 2 On Windows 10.
Apache HTTP Server commonly known as Apache or Apache 2 is among the most popular web servers used to host websites either locally or in production. This tutorial provides the steps required to install Apache 2 on Windows 10. The steps should be similar to install it on other versions of Windows including Windows Server systems.
Download Apache
We can download Apache 2 from the official Download Link. It provides various download options as shown in Fig 1.
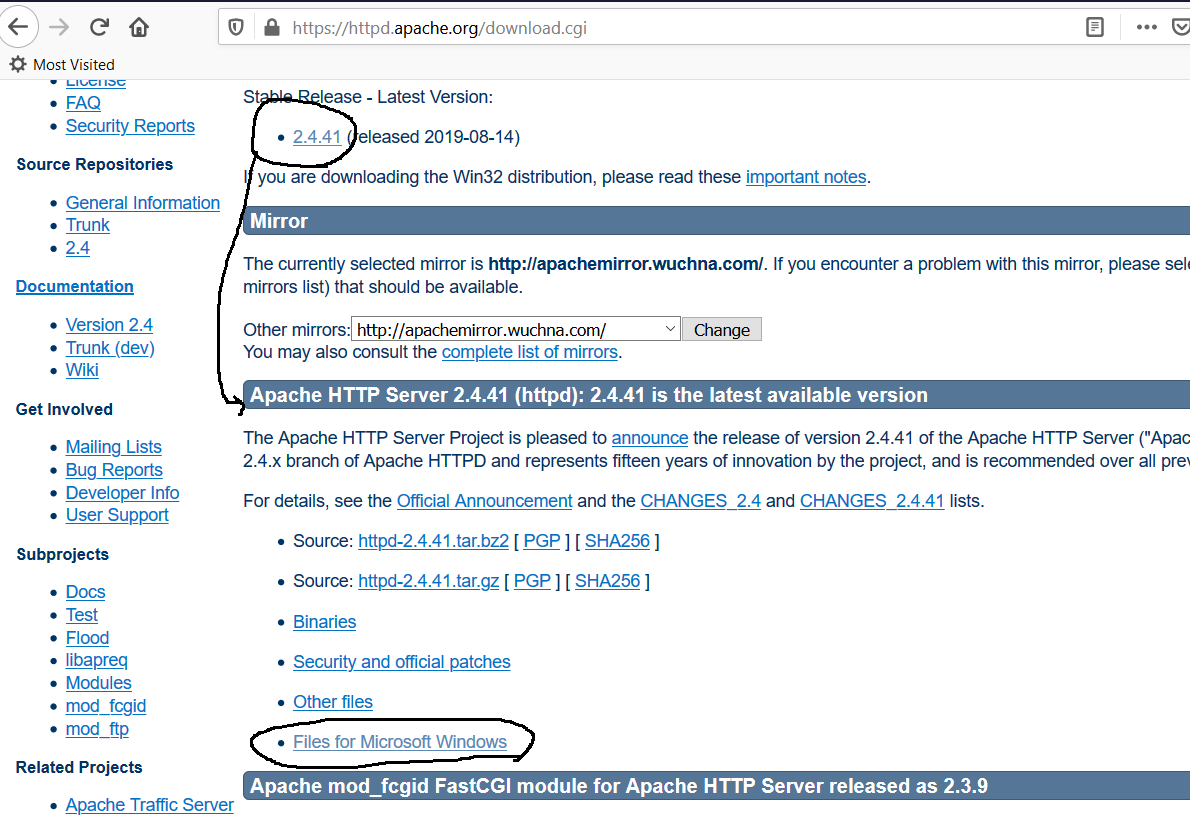
Fig 1
Scroll down and click the Files for Microsoft Windows Link. It will show the download options as highlighted in Fig 2.
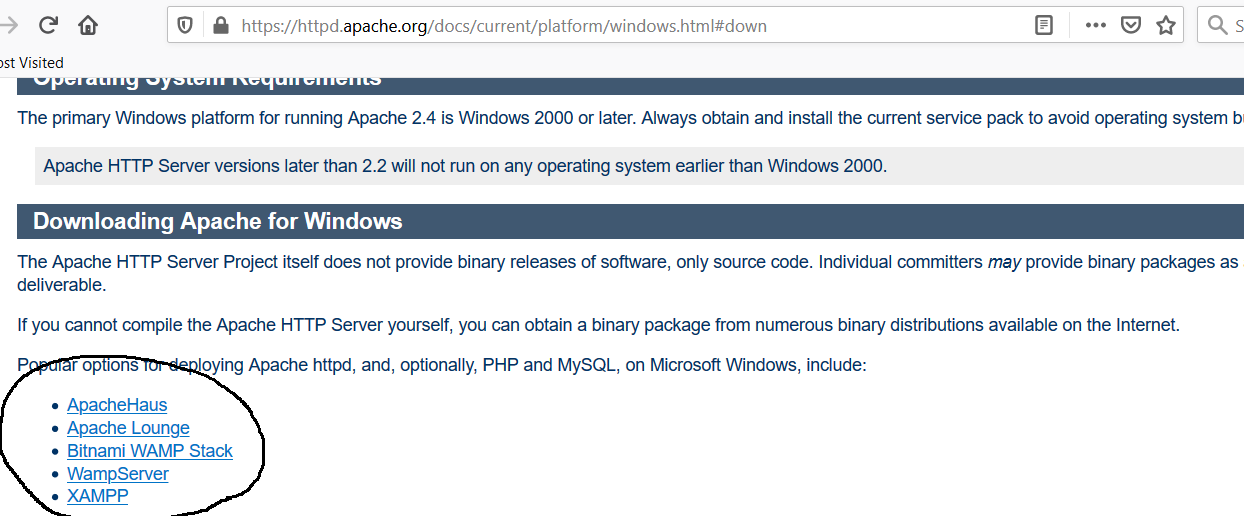
Fig 2
Apache itself does not provide the binaries for Windows. We can install Apache 2 with PHP, MySQL, MariaDB as part of WampServer or XAMPP distributions for Windows. You may follow How To Install XAMPP On Windows and How To Install WampServer on Windows to install Apache 2 bundled with XAMPP and WampServer.
This tutorial provides the steps to install Apache HTTP Server distributed by Apache Lounge. Click the Apache Lounge Link as highlighted in Fig 2. It shows the download options as highlighted in Fig 3.
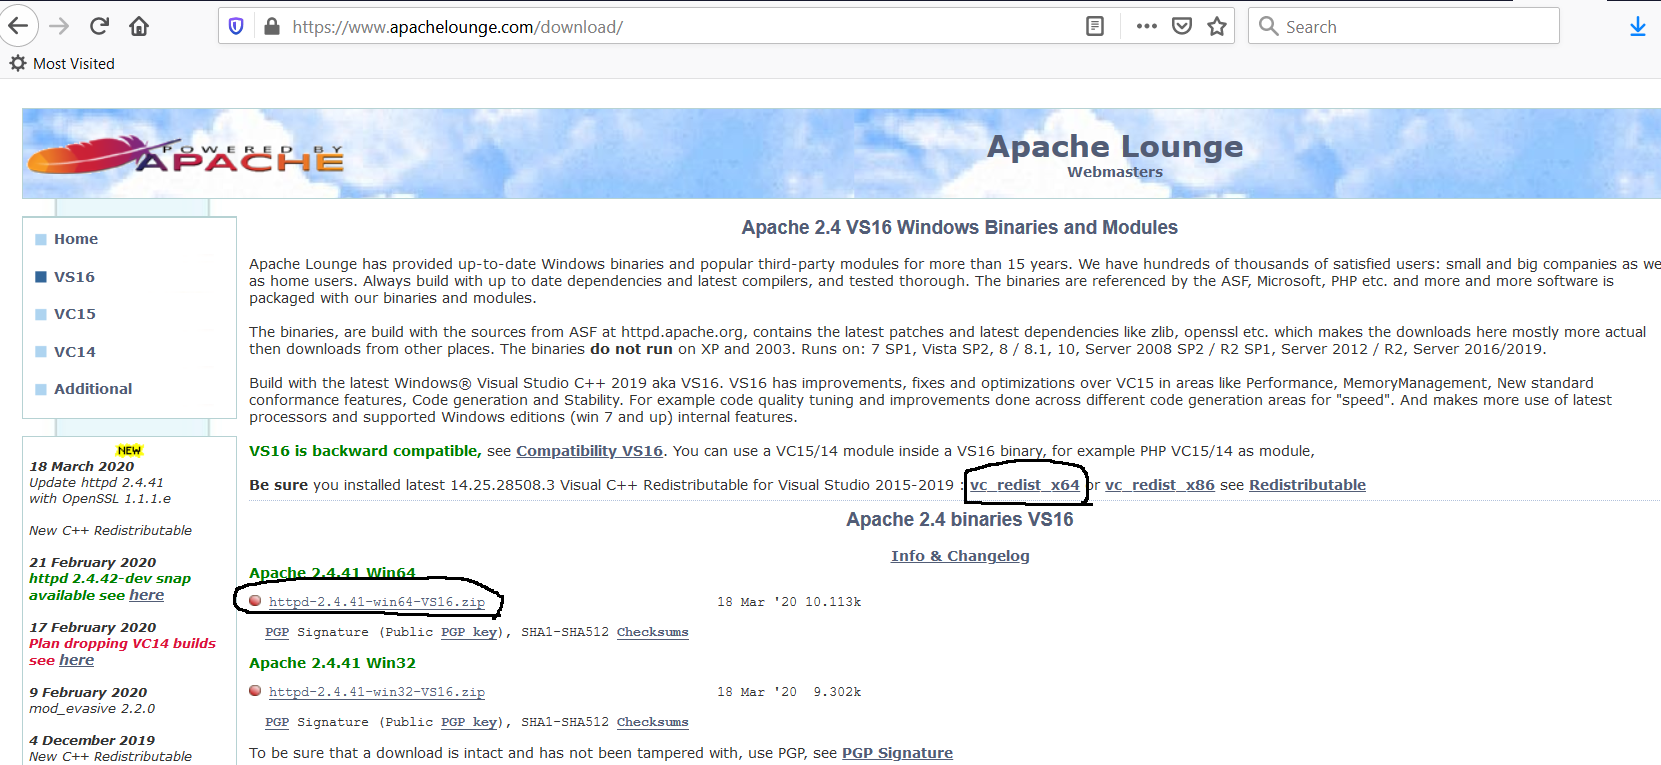
Fig 3
Apache Lounge also expects that the appropriate version of the Microsoft Visual C++ Redistributable package is installed on the system. Now click the downloadable zip option for 64-bit as highlighted in Fig 3. You can download the 32-bit version depending on your Windows installation. Also, verify the download using the PGP. You may be required to install the additional modules listed by Apache Lounge based on your project needs.
Install Apache
Now extract the downloaded zip at your preferred location to install it. It should create the files as shown in Fig 4.
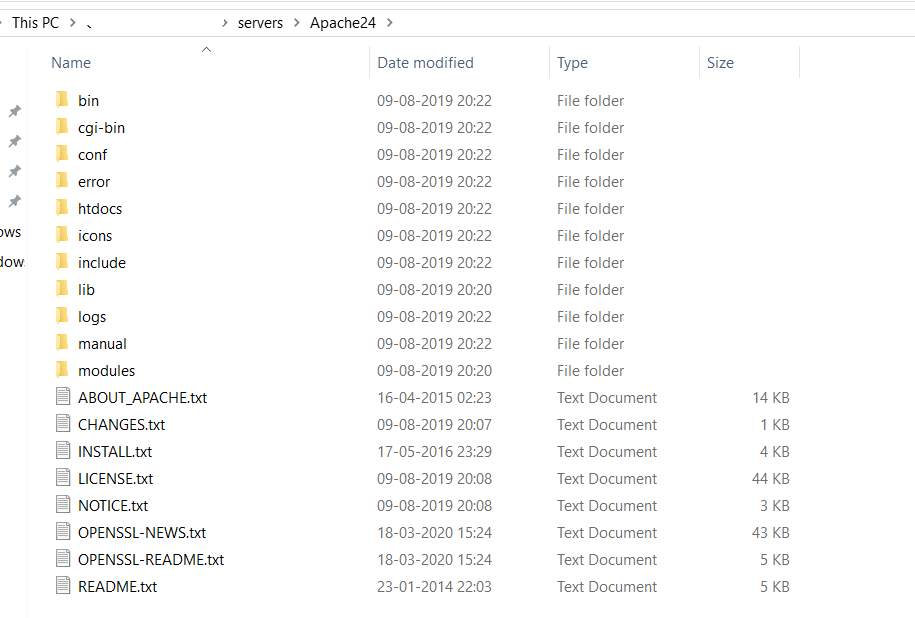
Fig 4
This is the only step required to install Apache HTTP Server on Windows 10. The main configuration file of the server i.e. httpd.conf is available in the conf directory. You can further configure it based on your needs. Now open the bin directory to view the executables. It provides httpd.exe to start the server and ApacheMonitor.exe to monitor the server.
Now update the ServerRoot in the httpd.conf as shown below.
....
....

#
# ServerRoot: The top of the directory tree under which the server's
# configuration, error, and log files are kept.
#
# Do not add a slash at the end of the directory path.  If you point
# ServerRoot at a non-local disk, be sure to specify a local disk on the
# Mutex directive, if file-based mutexes are used.  If you wish to share the
# same ServerRoot for multiple httpd daemons, you will need to change at
# least PidFile.
#
Define SRVROOT "<your installation path>/Apache24"

ServerRoot "${SRVROOT}"

....
....
The default directory to serve the documents is htdocs as shown below.
#
# DocumentRoot: The directory out of which you will serve your
# documents. By default, all requests are taken from this directory, but
# symbolic links and aliases may be used to point to other locations.
#
DocumentRoot "${SRVROOT}/htdocs"
<Directory "${SRVROOT}/htdocs">
    #
    # Possible values for the Options directive are "None", "All",
    # or any combination of:
    #   Indexes Includes FollowSymLinks SymLinksifOwnerMatch ExecCGI MultiViews
    #
    # Note that "MultiViews" must be named *explicitly* --- "Options All"
    # doesn't give it to you.
    #
    # The Options directive is both complicated and important.  Please see
    # http://httpd.apache.org/docs/2.4/mod/core.html#options
    # for more information.
    #
    Options Indexes FollowSymLinks

    #
    # AllowOverride controls what directives may be placed in .htaccess files.
    # It can be "All", "None", or any combination of the keywords:
    #   AllowOverride FileInfo AuthConfig Limit
    #
    AllowOverride None

    #
    # Controls who can get stuff from this server.
    #
    Require all granted
</Directory>
Open the command prompt, navigate to the bin directory, and execute httpd.exe. It will ask to access the network as shown in Fig 5.
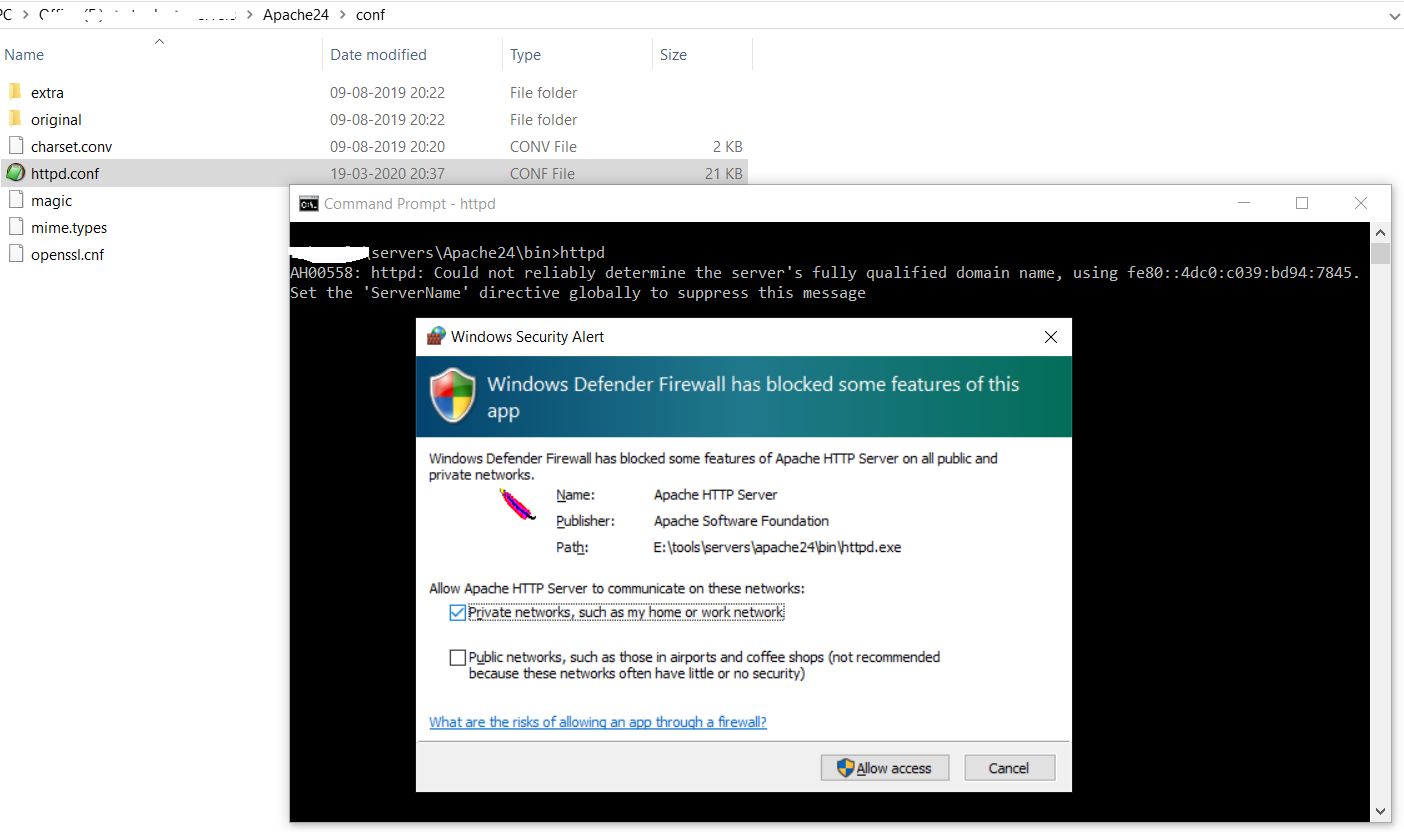
Fig 5
Provide appropriate permissions and click the Allow Access Button. It will start the Web Server using htdocs as the web directory. Now open the browser and navigate to http://localhost. It will show the default web page as shown in Fig 7.

Fig 7
This verifies that the Apache HTTP Server is running fine. Now press Ctrl + Z to stop the Server.
Apache as a Windows Service
In this step, we will configure the Apache HTTP Server to run as Windows Service so that we can start it on the system startup. Search CMD on Cortana, right-click and execute it as Administrator as shown in Fig 8.
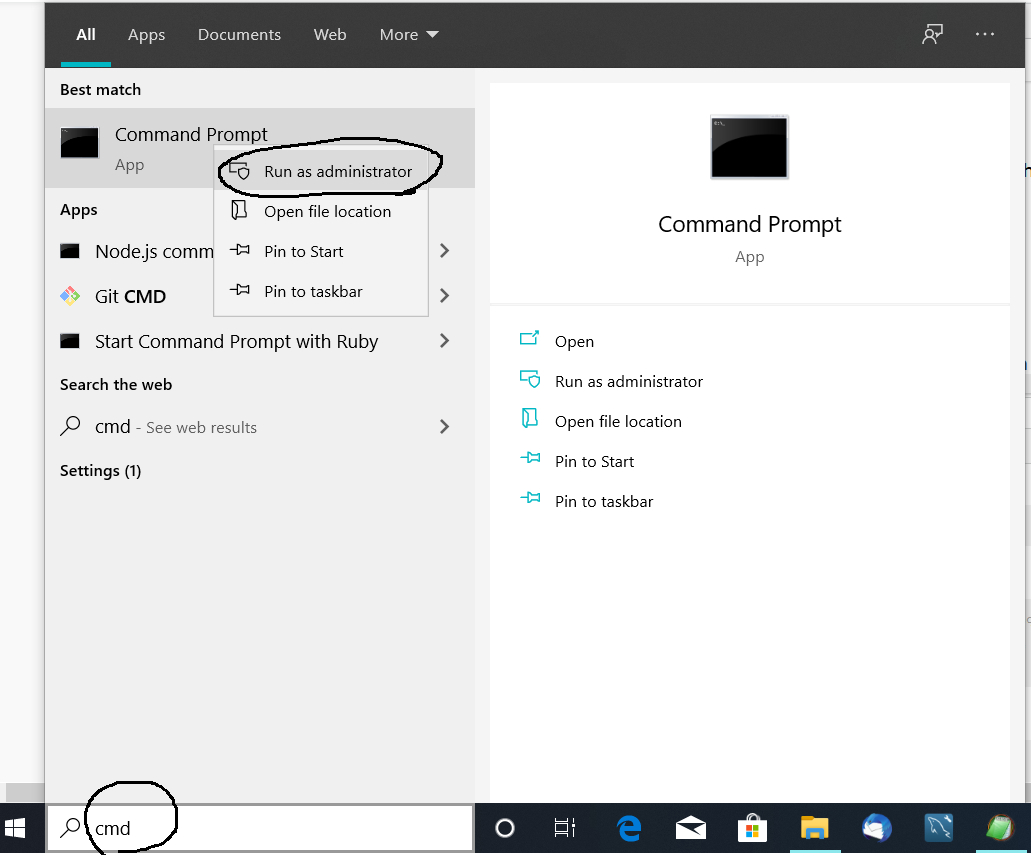
Fig 7
Now navigate to the bin directory of Apache installation and execute the command as shown in Fig 8 to add httpd.exe as system service.
# Install Service
httpd.exe -k install -n "Apache HTTP Server"

Fig 8
Now we can control the httpd.exe as system service using the Services Panel as shown in Fig 9.

Fig 9
The URL http://localhost should show the same output as we saw while running the server directly using the httpd.exe as shown in the previous step.
Summary
In this tutorial, we have discussed the steps required to install Apache HTTP Server on Windows 10 using the distribution provided by Apache Lounge.


